Goddess Locs Guide: How to Install and Style the Protective Hairstyle
Goddess locs is a great protective hairstyle that is easy to install and requires little maintenance. What sets them apart from regular faux locs is that they have curly or wavy ends.
This hairstyle creates the appearance of real locs with added curls to accentuate them. It's a favorite hairstyle because it can be styled in a variety of ways, and the longer you keep it in, the more beautiful it tends to be.
If you want to try Goddess locs as your next protective hairstyle, this article will guide you through how to install and style them, as well as everything you need to know to achieve this look.
How many packs of hair are needed for Goddess locs?
The number of hair packs required will depend on how full or long you want your Goddess locs to be. You can start with 6 packs of hair and add more extensions as needed to achieve your desired look.
How long does it take to install Goddess locs?
Installing Goddess locs is no small task. They take longer than box braids, so you should plan for a minimum of 5 hours to install them.
The time required for installation also depends on the length and style you want, as well as how fast your hairstylist works. We recommend blocking out your entire day, or planning to install the extensions during the weekend.
How long do Goddess locs last?
Goddess locs can typically last for 4 to 8 weeks (1 to 2 months), but their longevity also depends on how well you maintain and take care of them. It is recommended that you refresh them often by washing and moisturizing them.
Is Goddess locs heavy on the head?
The weight and bulkiness of your Goddess locs depend on the number of extensions used during installation. The more extensions you use, the heavier your locs will be.
The type of Goddess locs extensions used and the installation method are also factors to consider.
How can I install the Goddess locs?
Watch this video of Ivy for a detailed explanation on how to install Goddess locs in 3 easy steps.
How to Install Goddess Locs
What you need
- Your crochet pin
- Goddess locs extension
- Spring twist extension
- Styling mousse
Step 1: Braid or twist your hair

- Choose a braiding pattern of your choice, this could be a braid or twist.
- Divide your hair into small sections and braid or twist each section.
Keep in mind that the number of sections should depend on how many Goddess extensions you want to install.
If you have only 60 pieces of Goddess locs extensions, then make only 60 sections.
Step 2: Crochet the locs into the base of your hair

- Start by cutting out some strands of the locs extension.
- Using your crochet hook, loop the locs through the base of your braided natural hair and close the hook.
Make sure that your natural hair is not braided too tightly so that installing your Goddess locs won't be painful.
Step 3: Create a knot

- Pull the locs upwards to create a small knot at the roots, then wrap it around the base of your braid. This will make the root of your hair look firm and natural.
- Next, attach some strands of spring twists through the crochet at the small knot at the roots and then begin to wrap.
Step 4: Begin to wrap

- Hold your braided natural hair and goddess locs with one hand, and use the other hand to wrap the spring twists around them.
- Keep adding more pieces of spring twists until there's just a little bit of the goddess locs left at the ends.
- Once you have finished wrapping your locs with the spring twists, make sure to knot them at the ends before moving on to another section of hair.
Step 5: Apply styling mousse

- Once you've wrapped each section of your hair with the locs and spring twists, apply some styling mousse to your roots and the rest of your Goddess locs. This will seal it in and give it some definition.
- If you find that the ends of your Goddess locs are too curly, you can fold them in two and dip them in hot water for a few seconds to loosen up the curls.
- Your look is now complete! The end result should resemble this.

10 Ways To Style Goddess Locs
For your next salon visit, here are 10 styling ideas for your Goddess locs to choose from.
1. Shoulder Length Goddess Locs
Prefer shorter Goddess locs? Try them with a blonde highlight for a new look.

2. High Ponytail Goddess Locs
Adding a bright colored scarf to your Goddess locs and styling them in a high ponytail is a great way to add extra pizzazz to your look.

3. Goddess Locs in Space Buns
Styling your locs in two space buns framing your face is a great look for any occasion.

4. Half Up, Half Down Goddess Locs
Refresh your locs by styling them in a half up, half down bun. This will reduce tension on your roots when you let half of your locs fall free.

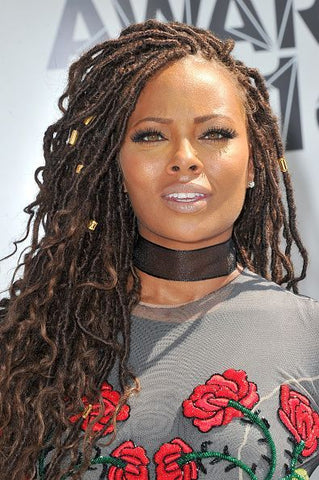
5. Long Goddess Locs
Go for longer looking Goddess locs, styled as a side or middle part.

6. Side Swoop Goddess Locs
You can show off your side profile by styling your Goddess Locs in a side swoop. This is perfect for a date or a night out with the girls.

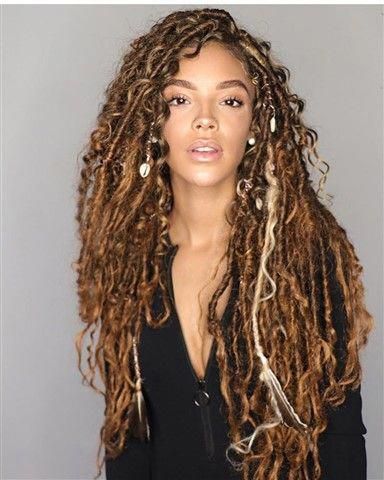
7. Ombre Goddess Locs
Adding an ombre color to your Goddess locs might be just what you need to take your hair game to the next level. To really enhance the look, consider accessorizing with cowries as well.
8. Top Bun Goddess Locs
You can pile your Goddess locs into a top bun, but make sure that the bun is loose so that you don't snag your edges.

9. Blonde Goddess Locs
Consider trying a blonde look for your Goddess locs. The color will complement your curls beautifully.

10. Brown Goddess Locs
Achieve a classy and chic look with brown Goddess locs paired with hair cuffs as accessories.